Showing posts with label temperature. Show all posts

Mar 29, 2012

Smoke Detectors

UPDATE
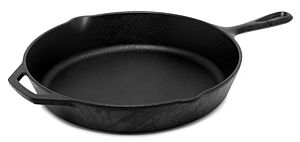
Another tip I received online was to use a shower cap over the smoke detector when cooking something that will smoke (like when using cast iron). Don't simply "deactivate" the alarm, you'll forget to enable it later. Simply slip a shower cap around the smoke detector, cook your meal, enjoy it, and you'll remove the cap later.
______________________________
The first couple of houses that I lived in didn't HAVE smoke detectors. It wasn't until I moved to Pittsburgh, PA in 1974 that I had ever seen them. I remember my dad dragging out the step ladder, drill, screws, screwdriver, smoke detector, and 9 volt batteries to install 2 in the house. One was outside my bedroom door and the other was in the living room (next to the kitchen). I also remember this was when my grandpa instructed ME to change the batteries in them. I'm not sure how it became MY responsibility to change them, but I am glad he did. I still change them twice per year, on the days that we change the clocks forward or back. Because of that, I still cringe on those days when I have to lug out the ladder and do that.

But, moving into a new built house in the late 90s and now living in an apartment has also taught me some things. Smoke detector technology has changed and we need to keep in touch with that if we are going to understand how they work and what they do.

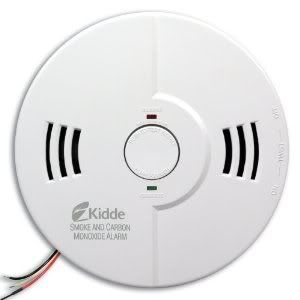
When I moved into the new built house, the contractor explained to me that the smoke detectors had advanced to the point that they not only detected smoke, but also were carbon monoxide detectors. They were "hard wired" into the electric panel now, and the battery only served a purpose if the electricity ever shut off (they would still work). But, I was diligent and changed them twice a year.

Available at Sears
And now in changing the batteries in my apartment taught me something else that has really helped me in cooking (especially in a cast iron skillet or Dutch oven). Newer smoke detectors actually have a button on them that you can press to shut them off for 7-20 minutes, should they go off for the wrong reason, like when you burn your home made home fries or hash browns. See my other blog entry about cooking oil smoking points in the kitchen for more info. And, it also vocally tells you whether it detected a fire or carbon monoxide. In the OLD days, you had to get the chair under the detector, rip the cover off, and rip the battery out. In my 90s house, you had to stand under it and fan it with a newspaper until it stopped. In my new apartment, I just have to reach up and press a button for 5 seconds (and then I have 7-20 minutes to clear the smoke out of the kitchen). WOW!!! Massively helpful things to know when I'm burning dinner.

Another new technology about the 4 smoke detectors in my apartment, is that they are all tied together by the wires in the walls. If ONE goes off, they ALL go off. So, if a fire starts down the hall in my son's room, the detector in MY room goes off. I'm more likely to hear it in my own room, than down the hall in his, with both doors closed. Yeah, that is another good development in smoke detectors.

Something else that I learned in doing some basic research, is that it is still recommended that you change your batteries twice per year, but it is also now recommended that you change your smoke detectors every 10 years. I'm fortunate that my apartment complex was only built 5 years ago, but I still listen to grandpa twice a year.

So, bottom line, some suggestions:
Change your smoke detector batteries on the days that you change your clocks, so twice per year.
Change your smoke detectors themselves, every 10 years to keep up on technology.
  Wire them all together so if one goes off, they all will go off and you are more likely to hear it.
Watch what cooking oils used in the kitchen to prevent burnt dinner smoke (see the blog for more info)
Enhanced by Zemanta

Feb 1, 2012

Crock Pot Italian Chicken Breasts

My crock pot
Yes, I raided the pantry again, to throw something in the crock pot that would be done when I got back from practice at 10:30 tonight and wouldn't really be in the mood to cook or stop at a fast food joint. So, here it is.

Ingredients:
  • 3 boneless, skinless chicken breasts (totaling 1.5 lbs)
  • 1 can of Italian spiced stewed tomatoes (undrained)
  • 1 8z can of tomato sauce
  • 2 tsp mixed Italian Herb seasoning
Directions:
  1. Place the chicken breasts in a crock pot
  2. Pour the stewed tomatoes & tomato sauce over them
  3. Sprinkle the seasoning over them
  4. Set on the LOW setting for 4-5 hours
Tortilla
Tortilla Image via Wikipedia
Serving Suggestions:
  • Serve whole chicken breasts over a bed of rice or pasta
  • Use 2 forks & shred chicken for a sandwich
    • Italian bread is a good start
    • Toasted Texas Toast is another good idea
    • Add some lettuce and roll it in a tortilla
  • Use shredded chicken as a topping for a medium or large sized salad
  • If you use any of the ideas above, make sure to add some shredded cheese into the meal
  • Whatever sauce is left in the crock pot after you have served dinner, save it for use tomorrow...

Jan 30, 2012

Cooking Oils

English: A cast-iron pan.
Image via Wikipedia
If you follow this blog, you will notice that I have made several entries about cooking and recipes (click to view them). But, it was to my dismay a few months ago, when my 2 decade old large cast iron skillet cracked and I had to get rid of it. I went out and replaced it with another one, and have begun again to properly season it. I had the first one just about "PERFECT" because my grandma taught me how to season cast iron skillets.

This entry is about doing some research about the oils used to cook or to season a cast iron skillet (or Dutch oven).  My grandma always instructed me to use peanut oil to season the cast iron before using it, and to apply a light layer to it after I had used, cleaned and was bout to store it, to keep it seasoned. She instructed me to keep olive oil and vegetable oil handy for use when cooking. Because I had to start the seasoning process with my new skillet, I got to thinking about how different cooking oils actually are. I found out a LOT about them...

To start with, I've always only used peanut oil to season my cast iron, never to cook in. I use olive oil for light frying or browning meat, and I use vegetable oil for heavier frying in a skillet or a touch of it in the wok. Oh, but when I make fried or scrambled eggs, I only use Olivio spread because it is butter made out of olive oil, so it combines two of my favorite things. I have only done that, because that is what grandma told me to do. But in looking at some data about oils, I might change my perspective about what I use.

A bottle of peanut oil.
Image via Wikipedia
The reason grandma always told me to use peanut oil to season my cast iron, is because as best summarized in what is shared by Wikipedia shares about Peanut Oil:
Peanut oil, also known as groundnut oil, is a mild tasting vegetable oil derived from peanuts.
Peanut oil is a common oil for frying foods, due to the high smoke point. The oil is used at Five Guys to cook their french fries.[4] Chick-Fil-A also uses peanut oil, for frying chicken.[5]
Using a mild tasting oil with a high smoke point means that "extra flavors" will not be added into what I'm cooking, but also it takes higher temps to get it to start smoking. Smoke point is the temperature that the oil reaches, before it starts to break down and emit a slight bluish smoke from your skillet or pot. And what causes that darn smoke detector to go off (how to silence that smoke detector when cooking is another blog entry). Now, back to the oil.

A chart borrowed from Wikipedia explains Smoke Point very well. I am going to restrict it to only include the oils I use. Soybean oil is predominately used to make what is labeled as "vegetable oil" (yeah, go read your label on your vegetable oil bottle).

Olive oil Virgin 391°F   199°C[6]
Peanut oil Refined 450°F   232°C[1]
Soybean oil Semirefined 350°F   177°C

So, it made a lot more sense to me what grandma was always saying, what happened in the kitchen when she used different oils. Seasoning the skillet with peanut oil means that there isn't any transfer of flavor to what you are cooking, but it is requires a higher temperature to smoke than any of the other oils you might use when cooking.

Okay, one more point that needs to be explained here, is "what temperature on the stove knob should I use when cooking with oils?" Some more research online, and some physical testing with some oil and thermometers are based on MY electric stove knobs, that have the 10 settings shown at right. Gas stoves might be slightly different. To keep in mind, is that electric stove top burners are designed to heat between 200°F and 500°F. To calculate the settings for YOUR stove, remember that there are 300 degrees between 200 and 500. Count the number of marks you have on your knob, subtract 1, and divide 300 by that number. That will tell you how many degrees exist between the steps. Start with 200 on the LOW and calculate up from there. Since I have 10 settings on my knob, I subtract 1 to get 9 steps, and divide 300 by 9. So, starting at LOW on my knob as 200°F, I step up approximately 34 degrees (but I round to 35 just to keep the math easy in my mind), the following is an indicator about what the settings are on MY stove. I did the Celsius conversions for my chart by using this formula (°F - 32) x 5/9 = °C (rounded to the nearest whole number).

LOW200°F93°C
SIMMER235°F113°C
2270°F132°C
3305°F152°C
4340°F171°C
MEDIUM375°F191°C
6410°F210°C
7445°F229°C
8480°F249°C
HIGH500°F260°C

Now, remember, they are APPROXIMATE. These are the kinds of things that you keep in your mind as mental references, they are NOT specific to your kitchen. Only YOU can figure out what your settings are by using oil in a pot, with a thermometer and writing the degrees next to your knob. Yes, you can also put your knob midway between two settings, but you'll have to figure out the approximate temp on your own (mine are approximately 17 degrees by doing that).

SO, WTF does that have to do with oil? Ummmm.... in case you didn't figure it out yet, look at the smoke point of each oil, and the setting of the knob that falls just short of making your skillet or pot smoke. While it is tempting to heat up that skillet fast, using too high of a temperature will set off your smoke alarm...trust me...I know what I am talking about, which is why I did this research. Keep the knob setting where it needs to be based on the oil that you are using, and slowly heat up the skillet for better success at cooking. If you need it fast, use an oil with a HIGHER smoke point or simply use the microwave.

I'm not going to go into the nutritional factors in comparing those oils, that may be ANOTHER blog entry (become a follower to be notified when it appears). But, as I mentioned earlier, I am reconsidering what oils I use for what. I will always use the peanut oil to season my skillets, but I might switch over to using it to cook in because of the smoke point and the nutritional factors that make it appealing. The only reason why I use vegetable/soybean oil is because it is cheaper. So, I guess it has it's own place in the kitchen, I just will buy smaller sizes of bottles of it.

Good luck...and happy skilletting...cook on...
Jan 28, 2012

Coffee Thoughts

I am still "old school" about coffee, to the point that I still use a percolator to make it (refer to my Percolated Coffee entry for more info). But, I came across an Instructable entry for Coffee Cubes that struck my fancy enough to post a follow up to that entry. I mention in the other entry that I let the mug sit for about 15 mins to cool off before I drink it. I worked construction and remodeling for nearly 2 decades, so I got used to room temperature coffee. Now, when I am in a hurry for that first mug in the morning, I started adding ice cubes to the coffee to cool it off.

I don't add any milk, cream, sugar or anything to the mug before I drink it, but the Instructable entry struck me. Instead of watering down my coffee by using just frozen water, I'm going to make the ice cubes from coffee. I don't have an ice maker, I use the old fashioned ice cube trays (the plastic ones like in the pic, not the metal ones but I am considering getting them too from the thrift store). The Instructable entry explains how to use whatever you normally put into your coffee for flavor as well, and it just makes sense to do it. I'm posting the picture from that site as an example. My cubes will look like the 6 cubes on the right of the picture.

Further research indicates that I can make the ice cubes from tea as well, to cool the tea without sacrificing flavor. I'll be using one ice cube tray with coffee and one tray with Earl Grey for the tea. I'm also considering making some ice cubes from some RC cola, but I'm sure the carbonated bubbles will be gone by the time it freezes, but to save the flavor, I'm going to try it. Stay tuned for another entry about that too.

Happy drinking...savor the flavor, not the temp...

Jan 12, 2012

Microwave Popcorn - From SCRATCH

Via Burp Rags & Bustiers
A similar-minded friend of mine shared something on Burp Rags and Bustiers (BR&B) that I had to re-share here. Of course, I did some research and learned more about popcorn than I ever thought possible. If you want to learn more about popcorn, Wikipedia-Popcorn is an awesome reference. But I digress, I am going to share the process first (to prevent you from having to scroll down too far), but then going to share some of the information I've learned in my research.

You can make "microwave" popcorn simply by having kernels and a paper lunch bag. Wow, I didn't know that. By doing it that way, you aren't subjected to all of the added chemicals of the commercial versions of "microwave popcorn" and the increased nutritional factors when using oils.

Via Burp Rags & Bustiers
On the BR&B site, she recommends a smaller amount of kernels because using too much can cause a bag explosion in your microwave. The image at the right exposes that. Further research shows that 2 to 3 Tablespoons per bag are suggested. But, you need to experience this to determine what works for you. I can't give you ALL of the answers cause I don't live with you.

Next, fold the bag top down 2 or 3 times (you need to leave some room for the popcorn to expand.

Microwave for 2:50 mins on high. You need to be aware of YOUR microwave, because the amount of time might depend on the wattage that you have. You might need to decrease or even INCREASE the time, depending on what you have. Do a "science fair project" to discover what works for you. Hope you get the blue ribbon.

When done, season with the flavor you want (chili powder, melted butter, shredded cheese, etc.), add them and shake the bag, and serve. Oh yeah, as a hippie dude, save the paper bag to fuel your next backyard fire in the fire bowl.

Now, since you were kind enough to scroll down this far, some findings and perspectives, due to my research:
White popcorn is more nutritionally beneficial to you than the yellow or "normal"
Don't add too many seasonings if you are concerned about nutrition
The FDA recommends 3 cups of popcorn per day to meet your "grain input" per day (for a 2,000 calorie input)
Don't feed popcorn to children under 4 years of age (due to choking)

Pop on...and good luck...let me know what you find out if you actually try this...

Jan 7, 2012

DIY Ice Packs

Being a DIY kind of a hippie dude, I decided to see if there was any way to make my own ice packs. Why? Over the course of my life, I've played a lot of sports (soccer, basketball, diving team, volleyball), remain very active (camping, hunting, rock climbing, spelunking, tai chi, qi gong, roller derby ref), and have a son that plays soccer, futsal, and is taking boxing training. As you can imagine, we have used ice packs a LOT. And yes, I learned from my grandma that using a bag of frozen veggies (peas work best) but now that I don't keep any of them in my freezer, I wanted to find another way to have some on hand, yet reduce the amount of chemicals and toxins that might be in the store bought ones.

You Just Need A Few Simple Ingredients To Make Your Own Gel Packs
Image from Tipnut link
In searching the web, I came across one particular website that gave the best amount of information about making your own ice-packs with items you most likely already have. It was the Tipnut entry about Quick & Easy Homemade Ice Packs. I'm going to save you a little surfing time by putting the key suggestions here and offer some other tips I've discovered on other sites.


Reusable gel type:
Method #1
2 cups water
1/3 cup vodka (80 proof)
Food coloring (any color you like)
Ziploc Freezer Bag
  • Pour liquids into Ziploc freezer bag, add food coloring (you’ll know at a glance that it’s your ice pack and not something to consume) then freeze.
Method #2
1 cup rubbing alcohol
2 cups water
Ziploc Freezer Bag (1 quart size)
  • Pour liquids into freezer bag, remove air and seal bag. Place bag seal side down into another Ziploc freezer bag, remove air and seal that bag. Place in freezer and use (and reuse) as needed (nice and slushy!).
Method #3
Liquid Dish Detergent
Ziploc Freezer Bag
  • Squirt liquid dish detergent in a Ziploc bag until the bag is about 3/4 full, seal and then freeze.
Okay, now some tips that I've come across in all of the comments on the pages and in my research.
Before using any ice pack or bag of frozen veggies, wrap it in a towel. The intensity of the coldness can
    damage the skin or nerves near the surface of the skin (depending on where you are putting it)
Putting the filled Ziploc bag into a second one (turned seal side down) helps insure less "leaking"
When filling the bags, use the amounts suggested because as liquids freeze, it expands a little.
  Do not use a homemade ice pack in a lunchbox for kids in school. They aren't allowed to have alcohol there
  Pets need these sometimes too


Anyway...keep active...but be prepared to to handle the boo-boos. I'm trying Method #3 but am using a "snack size" Ziploc and laundry detergent, because sometimes I only need a little one...

Jan 4, 2012

Thermostat Settings

Being single and living in an apartment can sure change your perspective about the thermostat, furnace, air conditioner, and utility costs. Doing some simple research showed that it can help reduce my utility costs if I utilize the thermostat properly. And now I'm going to share my findings with you. Unfortunately, I'm in an apartment and they won't let me install a programmable one, so I have to push the buttons myself.

One of the best sites I found regarding this was at the Madison Gas and Electric site. Being based in Madison, Wisconsin, I feel that they do have a good background in understanding heating during the winter. Go to their site to read a little more about "why" setting your thermostat back is good and what some of the myths are about doing it. A lot of other sites I researched said the same thing as theirs, but theirs was the easiest to read. I'm going to share the two important pieces of their site here:


The more you set back, the more you save

Set back 8 hours
per day
16 hours
per day
24 hours
per day
5%
10%
15%
7%
14%
21%
11°
11%
22%
33%
13°
13%
26%
39%
Check with your doctor if you have a medical condition that requires different temperatures. If you have had problems with pipes freezing during extremely cold weather, correct the problem before setting back.

Recommended thermostat settings

  Winter Summer
When you're home: 68°* 78°
When you're not at home: 55°* 85°
When you're sleeping: 55°* 78°
*Or as low as health permits. Check the owner's manual if turning down the temperature for more than 24 hours.
From Orvis
Since it is winter time where I am, I have set my thermostat to 60 F, last year I had it set at 64 F. I've compared my gas and electric bills, and they are 14% less this year than last. Yes, it means that I have to put on a sweatshirt or flannel shirt and throw an extra blanket on the bed, but it is definitely helping the bank account. I'm going to add to the mix of lowering the thermostat to 55 at night, and see what happens. Guess I have to get my Union suit pajamas out again.


Dozer dozing...
Last summer I set my thermostat at 74 F, but I think I'll set it up to 78 F next summer and see how that affects my bills. I'd set it higher when I am not home, but I do have Dozer here with me, so I'll be kind to him by keeping it lower.


Saving cents makes sense...and means more coffee at Dunkin Donuts...