Showing posts with label fire. Show all posts

Jul 6, 2012

Journey of the Hot Dog

WTF Casserole
It started by having dinner at a local restaurant that specializes in hot dogs. They have over 37 different ways that can be ordered. They come in "regular" size and "jumbo." I usually get the Old Yellar. But then I wanted some simple was for making hot dog meals in my own kitchen, in different ways beyond the "normal." I'm a little old school and keep a tablet and pen next to my computer and take copious notes. I don't know where some of this info originated, these were just the thoughts I jotted down.


Other than all of the traditional ways we've always prepared hot dogs, I only tended to use the WTF Casserole recipe that was jotted down on the back of an envelope in my recipe box. The first new way I tried a hot dog, was by using leftover mashed potatoes. Slit the cooked dog 7/8 of the way through along the length, and fill it with some leftover mashed potatoes (heated in the microwave). It actually was AWESOME. Next time I'll grab some leftover shredded cheese as a topping. I ate it rolled in a tortilla since I don't eat bread or buns.

But I came across a LOT more info that I scribbled in my notebook, and here is what I'll be endeavoring to bring the sensations of eating hot dogs this summer, to the forefront.

Do NOT boil hot dogs. Bring water to a boiling point, turn to simmer. Put dogs in for 20 minutes. Check the temp of the dog with an instant thermometer, but do not boil them.
Use a Dutch oven or stock pot with a steamer rack (like veggies) by bringing the water to a boil, turn to low, place the dogs in, cover tightly and steam for 5-7 minutes. Put the buns on top of them for the last 2 minutes or tortillas for the last 45 seconds.
Grilling requires turning them every couple of minutes, just when they start to darken, but before they become burnt (unless you want them that way). Hot dogs basically have 4 sides to them, so turn them over after about 2 minutes per side. Which means it takes about 8 minutes to grill them.
Over a true fire (when camping or using that fire pit) means dogs should be put OVER the flames or embers, but NOT in the flame itself.
We marinate a steak and add a marinade to poultry, why not a hot dog? I did manage to jot down the URL of a marinade for Grilled Hot Dogs (click the link to go there, I'm not copying and pasting).
Spiral Cutting the Dog
A link to the Why You Should Spiral-Cut Your Hot Dog for Grilling explains in a video an easy step, and provides some sound reasons why you should. I especially like the fact that the spiral cut prevents the relish and onions from sliding off and stops it from curling up at the ends.

Hmmmm....maybe I'll combine the last 2 points about marinating and spiral cutting into a single option of cutting first, THEN marinating... I'll keep you posted.

Jun 22, 2012

Take a Step Back in Time - Parenting

In today's economy, fast paced and demanding life, it isn't easy to be an effective adult, let alone a parent. As a single working parent, with a teenager, let me make a few suggestions. Take a step back in time to how things were when WE were growing up.

"Back in MY day," we only had 1 TV in the house, it only received about 15 channels (we didn't have cable), I was the remote to change the channel (by twisting a knob), and had to adjust the aluminum foil covered antenna by hand. Today, we have 500 Channels and Nothing to Watch. My suggestion? Turn off the electronic things, and take them out on the back patio to talk WITH, not AT them. Float an idea and LISTEN to what they say. Set aside the cable/satellite TV, wi-fi laptop, eTablet, and smartphone.

My son and I spent the evening on the back porch while it was breezy, and I asked him a few basic questions that generated a lot of conversations, and we laughed hard TOGETHER. This conversation enabled me to recapture what it means to be "young at heart." Some of the basic questions started with:
  • How did you sleep last night? Have any dreams? (clues you in to what is in their subconscious)
  • What was the best part of today? (lets you know what they enjoyed about this day)
  • What was the hardest part of today? (lets you know what might be "bothering" them)
  • What was the easiest part of today? (lets you know what they might excel at)
  • What was the most enjoyable part of today? (lets you know what sparks happiness)
  • Anything else you want to talk about?
The last one is what tends to generate the most conversation, once you get them talking. And once you do, "please hold on to the bar" because it is going to be an interesting ride. Once I got my son talking, we talked about school, soccer, girls, dating... yeah, that was DEFINITELY an interesting evening in front of the fire bowl.

But I digress... my suggestion is to shut off all of the electronic stuff that clutters your life, and live your own, accompanied by those immediately around you. Toast some marshmallows, make S'mores.

Mar 29, 2012

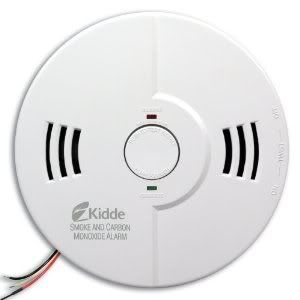
Smoke Detectors

UPDATE
Another tip I received online was to use a shower cap over the smoke detector when cooking something that will smoke (like when using cast iron). Don't simply "deactivate" the alarm, you'll forget to enable it later. Simply slip a shower cap around the smoke detector, cook your meal, enjoy it, and you'll remove the cap later.
______________________________
The first couple of houses that I lived in didn't HAVE smoke detectors. It wasn't until I moved to Pittsburgh, PA in 1974 that I had ever seen them. I remember my dad dragging out the step ladder, drill, screws, screwdriver, smoke detector, and 9 volt batteries to install 2 in the house. One was outside my bedroom door and the other was in the living room (next to the kitchen). I also remember this was when my grandpa instructed ME to change the batteries in them. I'm not sure how it became MY responsibility to change them, but I am glad he did. I still change them twice per year, on the days that we change the clocks forward or back. Because of that, I still cringe on those days when I have to lug out the ladder and do that.

But, moving into a new built house in the late 90s and now living in an apartment has also taught me some things. Smoke detector technology has changed and we need to keep in touch with that if we are going to understand how they work and what they do.

When I moved into the new built house, the contractor explained to me that the smoke detectors had advanced to the point that they not only detected smoke, but also were carbon monoxide detectors. They were "hard wired" into the electric panel now, and the battery only served a purpose if the electricity ever shut off (they would still work). But, I was diligent and changed them twice a year.

Available at Sears
And now in changing the batteries in my apartment taught me something else that has really helped me in cooking (especially in a cast iron skillet or Dutch oven). Newer smoke detectors actually have a button on them that you can press to shut them off for 7-20 minutes, should they go off for the wrong reason, like when you burn your home made home fries or hash browns. See my other blog entry about cooking oil smoking points in the kitchen for more info. And, it also vocally tells you whether it detected a fire or carbon monoxide. In the OLD days, you had to get the chair under the detector, rip the cover off, and rip the battery out. In my 90s house, you had to stand under it and fan it with a newspaper until it stopped. In my new apartment, I just have to reach up and press a button for 5 seconds (and then I have 7-20 minutes to clear the smoke out of the kitchen). WOW!!! Massively helpful things to know when I'm burning dinner.

Another new technology about the 4 smoke detectors in my apartment, is that they are all tied together by the wires in the walls. If ONE goes off, they ALL go off. So, if a fire starts down the hall in my son's room, the detector in MY room goes off. I'm more likely to hear it in my own room, than down the hall in his, with both doors closed. Yeah, that is another good development in smoke detectors.

Something else that I learned in doing some basic research, is that it is still recommended that you change your batteries twice per year, but it is also now recommended that you change your smoke detectors every 10 years. I'm fortunate that my apartment complex was only built 5 years ago, but I still listen to grandpa twice a year.

So, bottom line, some suggestions:
Change your smoke detector batteries on the days that you change your clocks, so twice per year.
Change your smoke detectors themselves, every 10 years to keep up on technology.
  Wire them all together so if one goes off, they all will go off and you are more likely to hear it.
Watch what cooking oils used in the kitchen to prevent burnt dinner smoke (see the blog for more info)
Enhanced by Zemanta

Jan 30, 2012

Cooking Oils

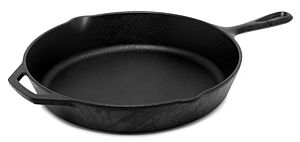
English: A cast-iron pan.
Image via Wikipedia
If you follow this blog, you will notice that I have made several entries about cooking and recipes (click to view them). But, it was to my dismay a few months ago, when my 2 decade old large cast iron skillet cracked and I had to get rid of it. I went out and replaced it with another one, and have begun again to properly season it. I had the first one just about "PERFECT" because my grandma taught me how to season cast iron skillets.

This entry is about doing some research about the oils used to cook or to season a cast iron skillet (or Dutch oven).  My grandma always instructed me to use peanut oil to season the cast iron before using it, and to apply a light layer to it after I had used, cleaned and was bout to store it, to keep it seasoned. She instructed me to keep olive oil and vegetable oil handy for use when cooking. Because I had to start the seasoning process with my new skillet, I got to thinking about how different cooking oils actually are. I found out a LOT about them...

To start with, I've always only used peanut oil to season my cast iron, never to cook in. I use olive oil for light frying or browning meat, and I use vegetable oil for heavier frying in a skillet or a touch of it in the wok. Oh, but when I make fried or scrambled eggs, I only use Olivio spread because it is butter made out of olive oil, so it combines two of my favorite things. I have only done that, because that is what grandma told me to do. But in looking at some data about oils, I might change my perspective about what I use.

A bottle of peanut oil.
Image via Wikipedia
The reason grandma always told me to use peanut oil to season my cast iron, is because as best summarized in what is shared by Wikipedia shares about Peanut Oil:
Peanut oil, also known as groundnut oil, is a mild tasting vegetable oil derived from peanuts.
Peanut oil is a common oil for frying foods, due to the high smoke point. The oil is used at Five Guys to cook their french fries.[4] Chick-Fil-A also uses peanut oil, for frying chicken.[5]
Using a mild tasting oil with a high smoke point means that "extra flavors" will not be added into what I'm cooking, but also it takes higher temps to get it to start smoking. Smoke point is the temperature that the oil reaches, before it starts to break down and emit a slight bluish smoke from your skillet or pot. And what causes that darn smoke detector to go off (how to silence that smoke detector when cooking is another blog entry). Now, back to the oil.

A chart borrowed from Wikipedia explains Smoke Point very well. I am going to restrict it to only include the oils I use. Soybean oil is predominately used to make what is labeled as "vegetable oil" (yeah, go read your label on your vegetable oil bottle).

Olive oil Virgin 391°F   199°C[6]
Peanut oil Refined 450°F   232°C[1]
Soybean oil Semirefined 350°F   177°C

So, it made a lot more sense to me what grandma was always saying, what happened in the kitchen when she used different oils. Seasoning the skillet with peanut oil means that there isn't any transfer of flavor to what you are cooking, but it is requires a higher temperature to smoke than any of the other oils you might use when cooking.

Okay, one more point that needs to be explained here, is "what temperature on the stove knob should I use when cooking with oils?" Some more research online, and some physical testing with some oil and thermometers are based on MY electric stove knobs, that have the 10 settings shown at right. Gas stoves might be slightly different. To keep in mind, is that electric stove top burners are designed to heat between 200°F and 500°F. To calculate the settings for YOUR stove, remember that there are 300 degrees between 200 and 500. Count the number of marks you have on your knob, subtract 1, and divide 300 by that number. That will tell you how many degrees exist between the steps. Start with 200 on the LOW and calculate up from there. Since I have 10 settings on my knob, I subtract 1 to get 9 steps, and divide 300 by 9. So, starting at LOW on my knob as 200°F, I step up approximately 34 degrees (but I round to 35 just to keep the math easy in my mind), the following is an indicator about what the settings are on MY stove. I did the Celsius conversions for my chart by using this formula (°F - 32) x 5/9 = °C (rounded to the nearest whole number).

LOW200°F93°C
SIMMER235°F113°C
2270°F132°C
3305°F152°C
4340°F171°C
MEDIUM375°F191°C
6410°F210°C
7445°F229°C
8480°F249°C
HIGH500°F260°C

Now, remember, they are APPROXIMATE. These are the kinds of things that you keep in your mind as mental references, they are NOT specific to your kitchen. Only YOU can figure out what your settings are by using oil in a pot, with a thermometer and writing the degrees next to your knob. Yes, you can also put your knob midway between two settings, but you'll have to figure out the approximate temp on your own (mine are approximately 17 degrees by doing that).

SO, WTF does that have to do with oil? Ummmm.... in case you didn't figure it out yet, look at the smoke point of each oil, and the setting of the knob that falls just short of making your skillet or pot smoke. While it is tempting to heat up that skillet fast, using too high of a temperature will set off your smoke alarm...trust me...I know what I am talking about, which is why I did this research. Keep the knob setting where it needs to be based on the oil that you are using, and slowly heat up the skillet for better success at cooking. If you need it fast, use an oil with a HIGHER smoke point or simply use the microwave.

I'm not going to go into the nutritional factors in comparing those oils, that may be ANOTHER blog entry (become a follower to be notified when it appears). But, as I mentioned earlier, I am reconsidering what oils I use for what. I will always use the peanut oil to season my skillets, but I might switch over to using it to cook in because of the smoke point and the nutritional factors that make it appealing. The only reason why I use vegetable/soybean oil is because it is cheaper. So, I guess it has it's own place in the kitchen, I just will buy smaller sizes of bottles of it.

Good luck...and happy skilletting...cook on...

Jan 6, 2012

DIY Colored Fireplace Pinecones

Most people like to sit by the fire to watch the flames dance. I remember doing that when I was young, and my grandfather managed to AWE & SHOCK me when he threw in a pinecone, it burned true yellow, and then he threw in another one and it burned yellow-green!!! Being intrigued, I asked where he got them. He made them, and then he spent two days teaching me how he did it. Recently I thought about it, so I decided see what other suggestions were out there.

Plow & Hearth
They are for sale in stores and online. Plow & Hearth has them for $40 for a 5 lbs. bag, Amazon has them for $20 for a 2.5 lbs. bag, and a lot of craft stores have them too. But in living near a lot of county park trails, and remembering what I was taught, I sought more information about making them myself, to not spend so much money. By walking Dozer in the woods and taking a bag with me, I collect as many pinecones as I can carry for free. I just need to have the right things in the pantry to add the color.

While I remembered that my grandfather used table salt for the yellow and Borax for the yellow green, a little more research shared some other household things that will create more colors. The best site I found (About.com/Chemistry) had a great table. I edited it a little to only include things you can get at a local store, which I summarized from Make-Stuff.com.

Color ChemicalWhere Found
Red Strontium Chloride or 
Strontium Nitrate
Found with aquarium supplies in pet stores
Orange Calcium Chloride Rock salt, to melt ice on roads & driveways.
Yellow Sodium ChlorideTable salt
Yellowish Green BoraxLook in laundry detergent section.
Green Copper SulfateLook for it in swimming pool supplies
Purple Potassium Chloride Is a salt substitute & found in the spice section
White Magnesium Sulfate Epsom Salts

Now your question is "what do I have to DO to make them?" Like all of the other recipes that I've posted, I will give you the ingredients, instructions, and tips. I found the best site to share with you, Birds & Blooms. I copied & pasted their info below, but check out their site too.
Prep Your Pinecones: (If you use plain pinecones purchased at a craft store, skip this step.) If you’ve gathered pinecones from the great outdoors, bake them in a 200 F oven for 1 hour to remove bugs and open up closed cones. Line a cookie sheet with aluminum foil first, as sap will drain from the cones. Allow them to cool.
Materials:
  • Large bucket
  • Tongs or slotted spoon
  • Flame colorant – choose one of the following from above, depending on the color flame you prefer
The Process:
  • Pour 1/2 gallon of hot water into the bucket.
  • Add 1 cup of the colorant of your choice, and stir until dissolved.
  • Add pinecones to the mix. Be sure to add only as many as can be completely covered by the solution. Soak for 8 hours or overnight.
  • Remove the pinecones and set on newspapers to dry completely – at least 3 days.
It enthralls the kids, and gives you romantic people something to watch, but I do have some tips.

      Do NOT use in a gas fueled fireplace, especially an enclosed one
      ✔ Do NOT use on a fire or BBQ where you will be cooking
      ✔ Do NOT keep the chemicals in touch with the kids
      Burn only one color at one time, mixing the chemistry changes
           things dramatically

But, when kicking back in front of the fireplace, fire bowl, or even campfire, it can help enhance the experience that everyone can enjoy...burn on...

Jan 2, 2012

Homemade Firebowl

Need to add some "ambiance" to your patio table? Well...I had been thinking about it and did a little searching for it, from a "DIY" stance since that is more of who I am.

I came across this blog post, and just had to share it: Rock Bowl w/ Flames.

What I like about it, is that you can make your own bowls very easily. When getting the Quickset concrete, you'll have enough to make a couple of these. And, using your "imagination," you can try some other things to enhance them.

Of course, you can always hand paint some designs on the outside, but they also do make some special dyes that you can add to the concrete to give it that special "feeling" without much more work.

Another thought that I had, was how I could cut down on even having to spend "that" much time to make the project.

I have several small clay pots that are simply cluttering up my garage. So, maybe I'll just try to figure out how to fill the bottom space in the pot, insert the gel packs, and surround them with rocks I collect when I'm hiking in the woods.

Bear in mind, that the gel packs that you get to use as the flame, may vary in COLOR based on what they are intended for. Play around with a few brands to vary the color of the flame, and to enhance the mood it is designed for.

I'll post again if I ever get my truly home made versions fired up...